How to Remove Windows Repairing System Rogue Anti-Spyware?
Windows Repairing System Information:
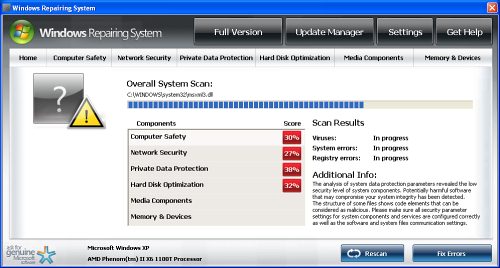
We publish this passage just to provide you some details about Windows Repairing System which is a rougeware as Windows Precautions Center, Windows Safeguard Utility, Windows System Tasks. It often advertises itself to be a helpful security solution. But in fact, it can just make the condition worse and leak out the victims’ privacy instead of improving computer defense. You were not asked yes or no when Windows Repairing System was installed on your computer. The hackers always spread Windows Repairing System via Trojans which can easily find your system leaks and break in. Once in your computer, Windows Repairing System will modify your Registry and set some files to your folders. And your system components will change at the same time. All these things happen silently, so we can’t see any portent. But soon it will do something to bother you. It pretends to do a free virus scan in your system. But even there is nothing dangerous in your computer, Windows Repairing System will claim it has found many issues in your machine such as virus or hardware damage. Then it will tell you if you pay some money to register its license, your problems will be solved perfectly. Don’t fall for its fictional promises. Don’t click any website provided by Windows Repairing System, or your browser will be hijacked to an ad webpage which steals your credit card details. Since the malware is dangerous, uninstall it right now. You may accomplish this process by the section below.
Windows Repairing System Screenshot:
Manual Removal
Note: If you are not proficient with computer, it’s suggested that you backup your registry before manually removing Windows Repairing System Rogue Anti-Spyware. And double check the entries that you are going to delete, or your computer can’t work for missing some files.
Step 1: Registry entries you need to delete:
HKEY_LOCAL_MACHINE\SOFTWARE\Microsoft\Windows NT\CurrentVersion\Image File Execution Options\afwserv.exe “Debugger” = ‘svchost.exe’
HKEY_LOCAL_MACHINE\SOFTWARE\Microsoft\Windows NT\CurrentVersion\Image File Execution Options\avastsvc.exe “Debugger” = ‘svchost.exe’
HKEY_LOCAL_MACHINE\SOFTWARE\Microsoft\Windows NT\CurrentVersion\Image File Execution Options\avastui.exe “Debugger” = ‘svchost.exe’
HKEY_LOCAL_MACHINE\SOFTWARE\Microsoft\Windows NT\CurrentVersion\Image File Execution Options\egui.exe “Debugger” = ‘svchost.exe’
HKEY_LOCAL_MACHINE\SOFTWARE\Microsoft\Windows NT\CurrentVersion\Image File Execution Options\ekrn.exe “Debugger” = ‘svchost.exe’
HKEY_LOCAL_MACHINE\SOFTWARE\Microsoft\Windows NT\CurrentVersion\Image File Execution Options\msascui.exe “Debugger” = ‘svchost.exe’
HKEY_LOCAL_MACHINE\SOFTWARE\Microsoft\Windows NT\CurrentVersion\Image File Execution Options\msmpeng.exe “Debugger” = ‘svchost.exe’
HKEY_LOCAL_MACHINE\SOFTWARE\Microsoft\Windows NT\CurrentVersion\Image File Execution Options\msseces.exe “Debugger” = ‘svchost.exe’
HKEY_CURRENT_USER\Software\Microsoft\Windows\CurrentVersion\Internet Settings “WarnOnHTTPSToHTTPRedirect” = ’0′
HKEY_LOCAL_MACHINE\SOFTWARE\Microsoft\Windows\CurrentVersion\Internet Settings “WarnOnHTTPSToHTTPRedirect” = ’0′
HKEY_LOCAL_MACHINE\SOFTWARE\Microsoft\Windows NT\CurrentVersion\SystemRestore “DisableSR ” = ’1′
Step 2: Files you need to delete:
%UserProfile%\Application Data\Microsoft\[random].exe
Attention! The above manual removal method we introduced needs some computer know-how. It’s highly recommended that you backup your system registry and other important files before the removal. You should understand exactly what items you are going to delete. If you delete any essential item, it will cause some serious problems or even system crash. If you are not that skilled, learn more about Method Two.
Method Two: Automatic Windows Repairing System Removal
First, restart your machine, hit F8 Key and enter into “Safe Mode with Networking”.
Second, download Windows Repairing System Virus Remover to your computer and install it following its instruction.
Third, open it and click “Scan” button to entirely scan for any possible virus.
Last, check the detected items and click “Remove” button to delete all the found threats.
With the help of Windows Repairing System Virus Remover, all possible viruses can be completely detected and deleted. So your problems can be solved in a few seconds.
Tips: It’s highly recommended that you use PCFixKit to repair your system, as your system may have been messed up some how. Repairing your system with RegTweak can make your PC work as excellent as before or even more excellent. Download PCFixKit here
Related posts:
Step by Step Uninstall/remove Windows Profile System virus Removal | Security-Wire.com on May 29th, 2011
[…] Profile System is a new member from a notorious malware family as Windows Repairing System, Windows Precautions Center and Windows Safeguard Utility. All the members mentioned behave […]