How to Remove System Diagnostic Fake Security Program?
# This article How to Remove System Diagnostic Virus is an article in Spyware Removal Instructions, the original author is Security-Wire.com .You can read more information in the following:
System Diagnostic Information:
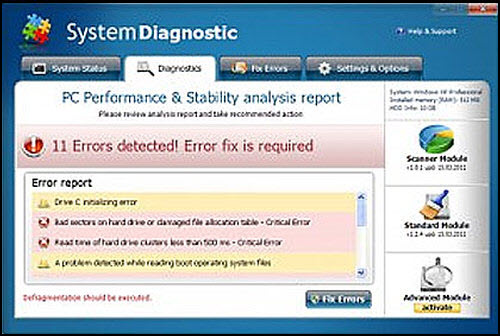
System Diagnostic (aka SystemDiagnostic) is a new fake system optimizer that comes after Windows Diagnostic malware. Based on its aggressive activities on infected computer, System Diagnostic is clasified as a fake application. It has no ability to do anything it claims. And, System Diagnostic even reports imaginary system errors which turn out to be false. After intruding into your workstation, this malware begins to disturb you with fabricated scan report displaying plenty of system problems found on your workstation and asks you to fix them ASAP. And you follow its instruction and click on the “fix” button, you will go to a webpage advertising System Diagnostic and trying to convince you to purchase a copy of the program. Do you dream that System Diagnostic will fix your problems? That’s impossible, because it was created by hackers to cheat your money with invented errors rather than help you solve your problems. In other words, its creators did not work out any optimization engine for System Diagnostic. They just invented a good-looking user interface and make this scamware look legitimate and trustworthy. Don’t become another victim of this scam. If you find it on your system, just find more information below and remove System Diagnostic immediately.
System Diagnostic Screenshot:
Manual Removal
Note: If you are not proficient with computer, it’s suggested that you backup your registry before manually removing System Diagnostic Rogue Anti-Spyware. And double check the entries that you are going to delete, or your computer can’t work for missing some files.
Step 1: Processes you need to end:
[random].exe
Step 2: Registry entries you need to delete:
HKEY_CURRENT_USER\Software\Microsoft\Windows\CurrentVersion\Run “[random].exe”
HKEY_CURRENT_USER\Software\Microsoft\Windows\CurrentVersion\Run “[random]”
HKEY_CURRENT_USER\Software\Microsoft\Windows\CurrentVersion\Policies\Associations “LowRiskFileTypes” = ‘/{hq:/s`s:/ogn:/uyu:/dyd:/c`u:/bnl:/ble:/sdf:/lrh:/iul:/iulm:/fhg:/clq:/kqf:/`wh:/lqf:/lqdf:/lnw:/lq2:/l2t:/v`w:/rbs:’
HKEY_CURRENT_USER\Software\Microsoft\Windows\CurrentVersion\Policies\Attachments “SaveZoneInformation” = ‘1’
HKEY_CURRENT_USER\Software\Microsoft\Internet Explorer\Download “CheckExeSignatures” = ‘no’
HKEY_CURRENT_USER\Software\Microsoft\Internet Explorer\Main “Use FormSuggest” = ‘yes’
HKEY_CURRENT_USER\Software\Microsoft\Windows\CurrentVersion\Internet Settings “WarnonBadCertRecving” = ‘0’
HKEY_CURRENT_USER\Software\Microsoft\Windows\CurrentVersion\Policies\System “DisableTaskMgr” = ‘1’
Step 3: Files you need to delete:
%AllUsersProfile%\Application Data\~[random]
%AllUsersProfile%\Application Data\~[random]
%AllUsersProfile%\Application Data\[random].dll
%AllUsersProfile%\Application Data\[random].exe
%AllUsersProfile%\Application Data\[random]
%AllUsersProfile%\Application Data\[random].exe
Please, be aware that manual removal of System Diagnostic Rogue Anti-Spyware is a cumbersome task and can not always ensure complete removal of the malware, due to the fact that some files might be hidden or may get reanimated automatically afterwards. Moreover, lack of the required skills and even the slightest deviation from the instructions may lead to irreparable system damage. That’s why it’s strongly recommended automatic removal of System Diagnostic Rogue Anti-Spyware, which will save your time and enable avoiding any system malfunctions and guarantee the needed result.
Automatic System Diagnostic Rogue Anti-Spyware Removal:
1. Restart your computer and keep pressing F8 Key before Windows launches. Use the arrow keys to select the “Safe Mode with Networking” option, and then hit ENTER Key to continue.
2. Download System Diagnostic Remover, install it and update its database to the latest. After that, restart your computer so as to make System Diagnostic Remover fully functional. Repeat Step 1 into Safe Mode and run an Online Scan of your computer so that System Diagnostic Remover can detect all potential malware in your system.
NOTE: If you have problem installing System Diagnostic Remover, you can download this correction script, unzip it and then double click to run it. It will correct your registry settings that the virus has modified. Then double click the program and finish the installation.
3. After the Online Scan finishes, click “Details” for the malware detected to make sure that your important data are not infected and removed. Ignore or select the scan result and click “Remove” to remove the threats. Reboot your computer and let System Diagnostic Remover delete all detected virus.
4. Click to repair your corrupted registry
Why should you need to repair the registry?
As we all know, virus and Trojans modify and destroy system registry and make the computer malfunction so that the computer will not perform normally. Even if the virus and Trojans are removed, the registry is still destroyed or modified, so the computer still has problems. That’s the very reason why you need to repair the registry. At the meanwhile, some virus and Trojans leave some DLL files in the registry and this will cause strange DLL errors and affect the computer performance.
To make your computer run as perfectly as before or much faster than before:
1. Download and install Multi-Awarded Registry Tool.
2. Run a full scan of your registry.
3. Click “Repair Problems” and repair all errors detected.
After these 3 easy steps, your computer will run much faster than before within minutes!


Related posts: